

What are “Absences” in WorkPal?
Absences let you mark time off for your mobile users, so their schedule clearly shows when they are unavailable. This could be for annual leave, sickness, appointments, or any other approved time away from work.
Once an absence is added, it appears directly on the user’s "schedule". This gives you a quick, at a glance view of who is working and who is absent, helping you manage coverage, plan jobs, and avoid assigning work to unavailable team members.
In short, absences help keep everyone aligned and your schedules accurate.
Default absence types
When you first log in to WorkPal, we automatically set up five standard absence types:
• Holiday.
• Half Day.
• Sick.
• Medical Appointment.
• Compassionate Leave.
These are just starting options. You’re free to configure them at any time, this is easy to do! Follow the steps below to find out how to add additional absence types or remove any you don't use!
From the desktop version, Click the WP logo.
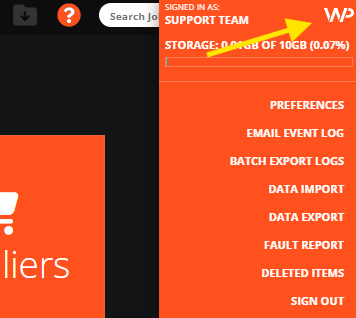
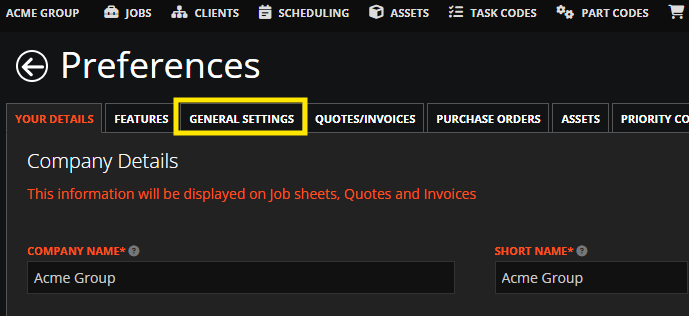
Select "Preferences"
Select "General Settings"
Scroll down the page until you get to the "users" section.
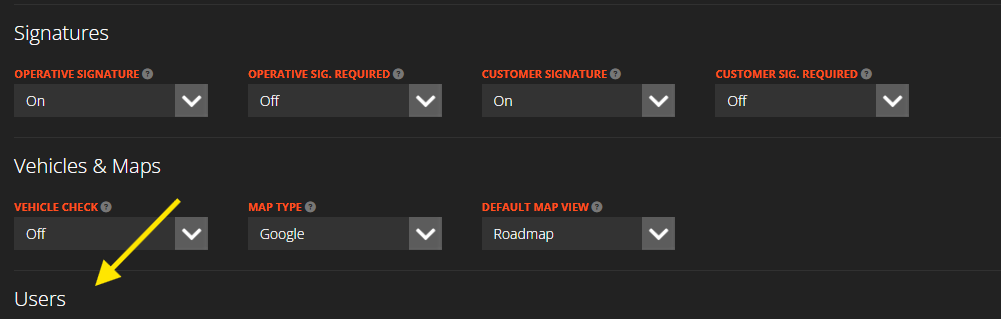
From here, you will now see "absence types"

From here you can now remove, add or edit any of these existing options to your liking.
How to add an absences.
Adding an absence from the desktop.
Adding a user from the desktop side of WorkPal is easy! Simply follow the steps below to add an absence for a user.
Go to the "Users" tab.

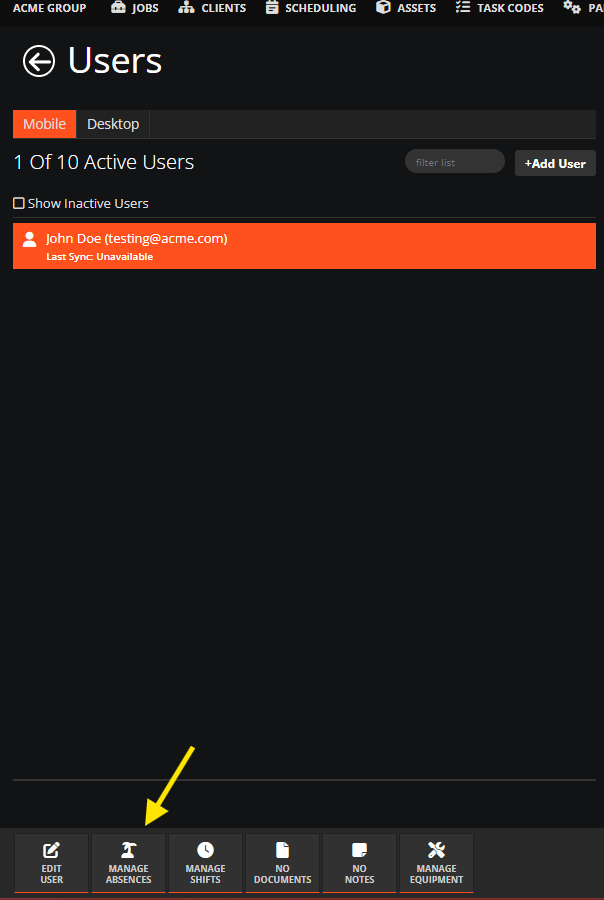
Select the user you wish to add an absence to.
At the bottom left hand side of the screen click the "manage absence button.
Simply click the "add" button at the top right.

Select the absence type from the dropdown list.
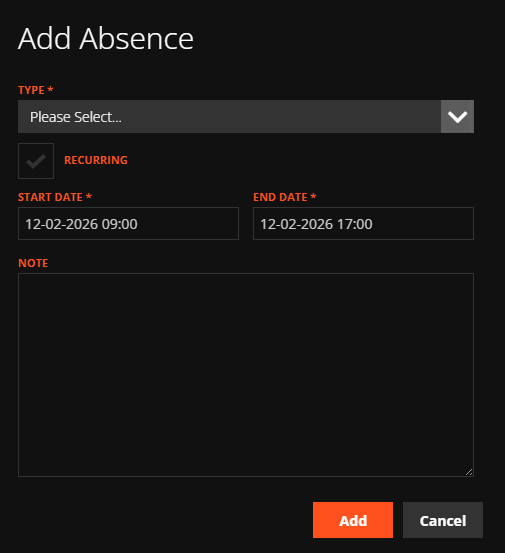
You can choose whether you want it to be a recurring absence or not by ticking or unticking the "recurring" box.
Fill in the start and end dates for the absence.
Add any notes related to the absence.
That's it! Now you have added an absence for one of your mobile users. You can go to the "schedule" to view this absence and you will see it highlighted in red with the text of whichever absence type you chose. See screenshot below.

Requesting an absence from the mobile app
Requesting time off from the mobile app works a little differently than on desktop.
Mobile users "request" absences that need to be added manually by the desktop user rather than adding them directly from the mobile app.
They submit an absence request by completing a holiday or absence request form in the app. Once submitted, this request needs to be reviewed and approved by a desktop user before it appears on the schedule.
This approval step helps make sure all absences are confirmed and managed centrally, keeping your team schedules accurate and up to date.
You also have the flexibility to create your own custom holiday or absence request form using WorkPal’s Form Builder. This is perfect if you’d like to capture extra details or tailor the process to your business.
The article below will guide you through creating your own request form
Need a Hand?
If you're experiencing any issues adding, editing, approving, or managing Absences in WorkPal, our Support Team is here to help.
📞 028 9344 5660
📧 support@workpal.app
🌐 www.workpal.app