

Connecting WorkPal to QuickBooks: A Quick Guide
Getting WorkPal and QuickBooks talking is straightforward and will really help with your invoicing. Here's how to set it up:
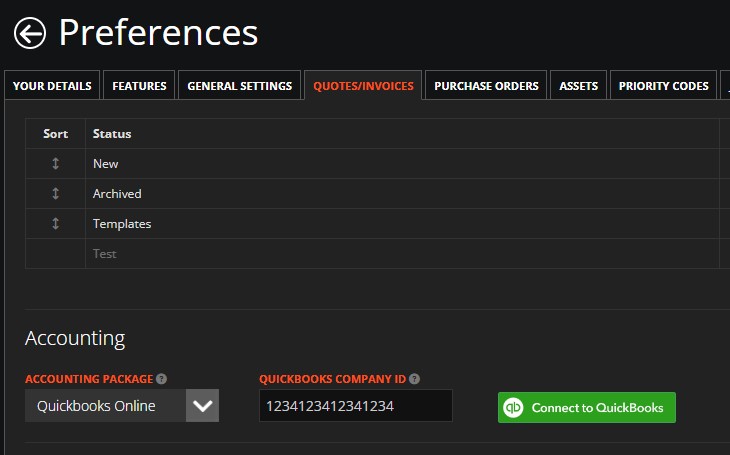
1- In WorkPal, go to WP logo (top right corner of screen) > Preferences > Quotes/Invoices.
2- Select QuickBooks as your Accountancy Package.
3- Enter your QuickBooks ID (find this in QuickBooks under Settings > Subscriptions and Billing).
4- Click 'Connect to QuickBooks' and sign in with your QuickBooks account when prompted.
5- Back in WorkPal, click 'Get VAT Rates' to pull your rates from QuickBooks.
6- Choose a Default VAT Rate for new clients.
7- Click 'Update' (top right) to save everything.
8- Finally, open any WorkPal invoice and click the 'QuickBooks Export' button to send it over.
And that's it! You're all connected! If you hit any snags, just give us a shout.
Understanding what gets sent from WorkPal to QuickBooks
Example Invoice from WorkPal:

Exported Invoice on QuickBooks:


Understanding Terminology: WorkPal vs. QuickBooks
To help you navigate between WorkPal and QuickBooks seamlessly, here's a helpful breakdown of how key terms align between the two platforms. We've matched up the common labels so you know exactly where your information is being transferred.
WorkPal Invoice | QuickBooks Invoice |
Client | Customer (Will be created on QuickBooks if not found - Client and Customer Name must match) |
Client Address | Billing Address (Customer Billing Address) |
Site Address | Shipping Address (If Filled) |
Invoice Term (Days) | Terms - Come from Preferences -> Quotes/Invoices - "QuickBooks Sales Term Ref" |
Invoice Date | Invoice Date |
Need a Hand?
If you're experiencing any issues setting up, configuring, or using the QuickBooks Integration in WorkPal, our Support Team is here to help.
📞 028 9344 5660
📧 support@workpal.app
🌐 www.workpal.app