

Using the Job List in WorkPal
The Job List is your central hub for viewing and managing all jobs in WorkPal. It gives you a clear, organised overview of your workload and allows you to quickly take action on one or multiple jobs at once.
This is your job list. You can see all of the different columns here from here.
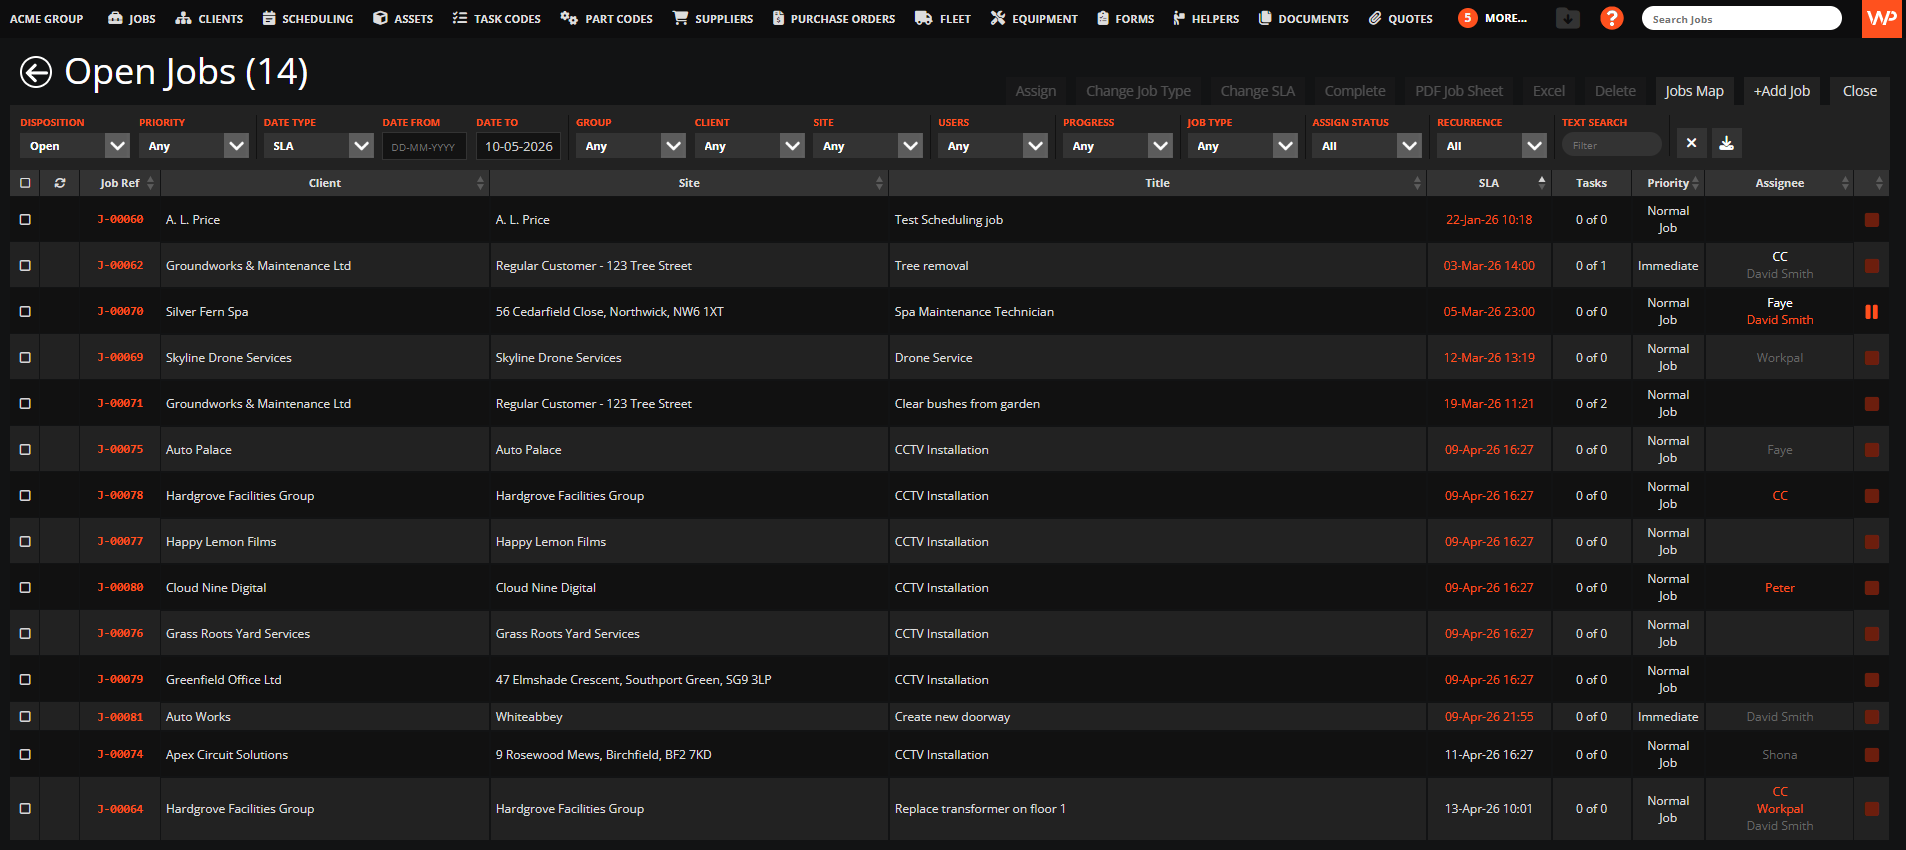
Whether you’re reviewing active work, checking completed jobs, or prioritising what needs scheduling, the Job List helps you stay in control.
Understanding Job Status (Disposition Filter)
At the top of the Job List, you’ll find filters that help you focus on specific types of jobs.
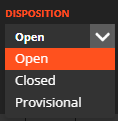
One of the most important is the Disposition filter, which shows the current status of each job:
Open → Jobs that are currently active and in progress
Closed → Jobs that have been completed
Provisional → Jobs that have been created but do not yet have an SLA
This makes it easy to quickly identify what still needs attention, especially when planning or scheduling work.
Managing jobs from the toolbar
At the top of the Job List, you’ll find a toolbar that allows you to take action on jobs without needing to open each one individually.
This is ideal for making quick updates and managing jobs more efficiently.

Working with multiple jobs
You’re not limited to updating one job at a time.
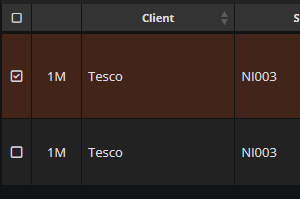
Using the tick boxes on the left-hand side of the list, you can select multiple jobs and process them together. This is particularly useful when:
Assigning several jobs at once
Updating statuses in bulk
Configuring the Job List
Every business works slightly differently, which is why the Job List can be configured to suit your needs.
This includes not only the columns you see, but also the overall layout and structure of the list itself. By tailoring the Job List to your workflow, you can reduce clutter, improve visibility, and make day-to-day job management much more efficient!
Accessing Job List settings
To configure your Job List:
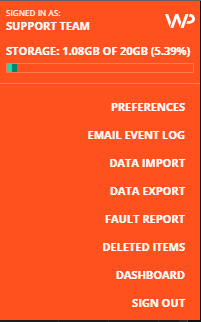
Click the WorkPal logo in the top right corner
Open the Preferences Menu
Select the “Job List” tab
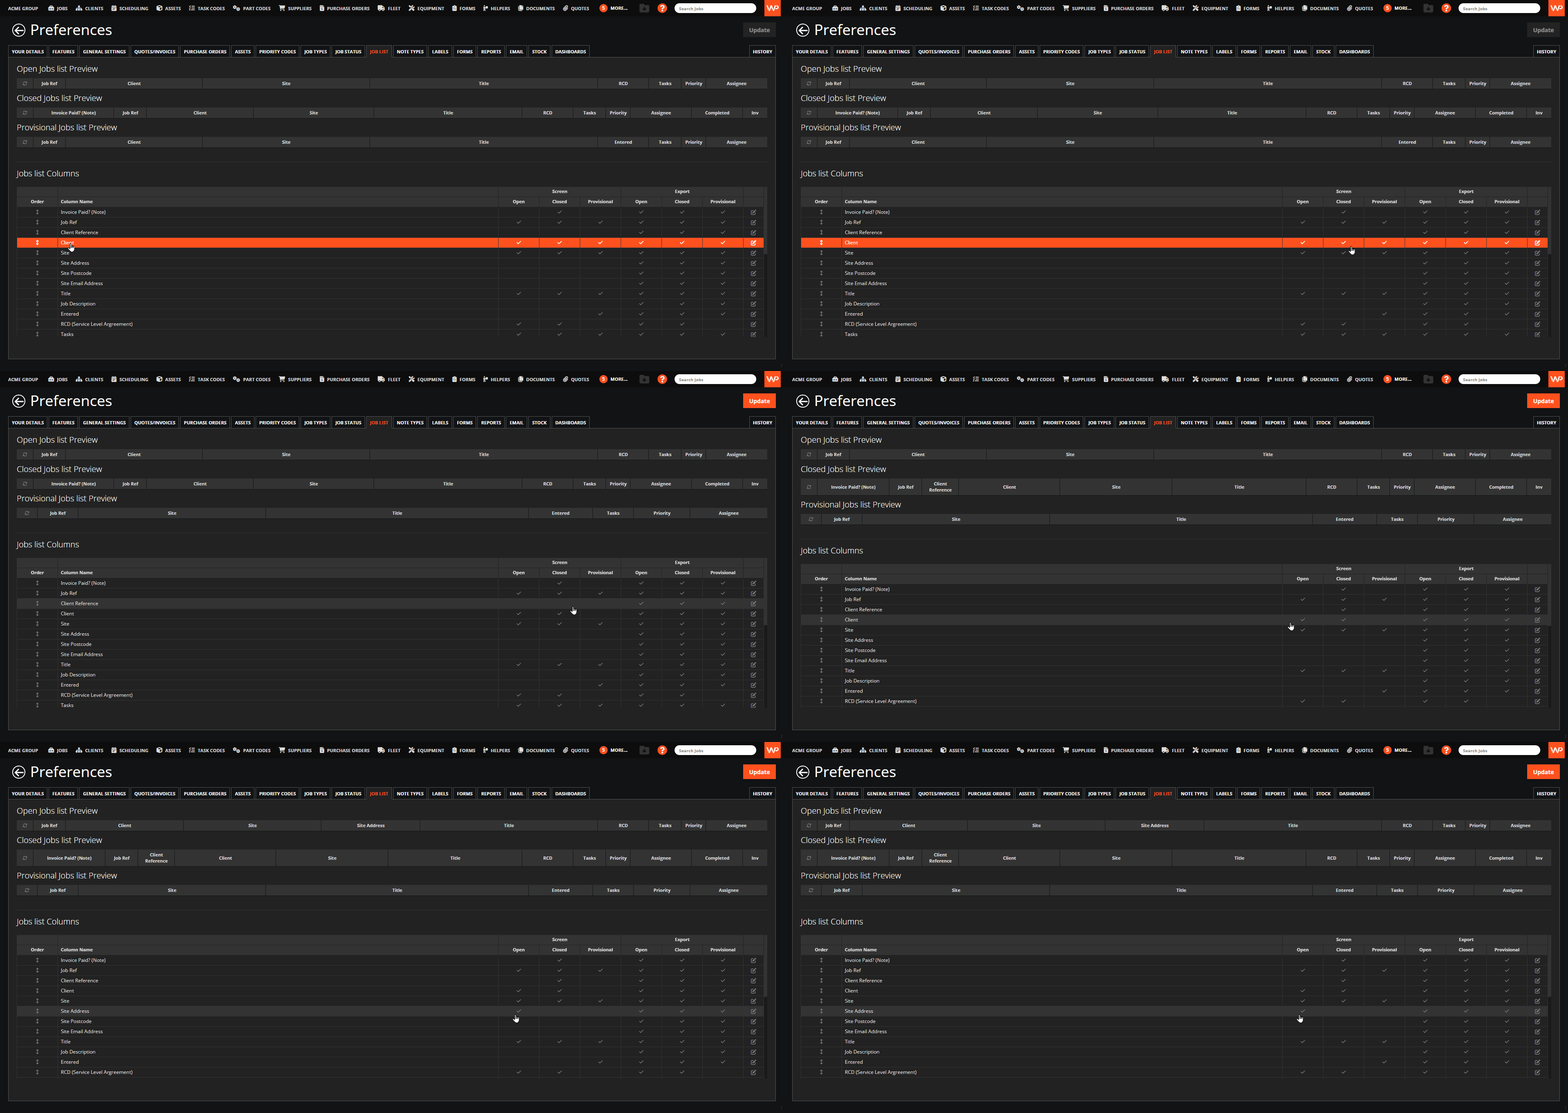
Customising your columns
You’ll see a preview of the columns that appear in your Job List.

From here, you can:
Tick or untick fields to control which columns are displayed
Adjust your layout to highlight the most important job information
Simplify your view by removing unnecessary fields
Editing column names
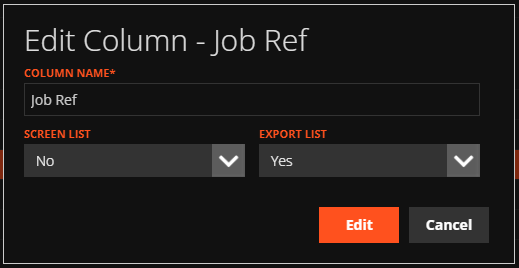
You can also rename columns to better match your internal terminology.
Simply click the edit icon next to a column to update its name.
This is particularly helpful if your team uses specific wording or labels for job information.

Controlling visibility and exports
Each column can be shown or hidden in two places:
On the Job List screen
In the exported spreadsheet
This gives you full control over both your day-to-day view and the data you share externally.
Adding custom columns
If you need to capture additional information, you can create a custom column using Note Types.
This allows you to extend the Job List beyond standard fields and tailor it to your business needs.
For more detail, see the guide on Note Types.
Quick tips
Use filters to quickly narrow down your workload
Configure your columns to reduce clutter and improve visibility
Need a Hand?
If you're experiencing any issues configuring or using Job List Preferences in WorkPal, such as displaying the wrong information, changing column layouts, applying filters, or saving your preferences, our Support Team is here to help.
📞 028 9344 5660
📧 support@workpal.app
🌐 www.workpal.app