

Adding Images in WorkPal
WorkPal allows you to either take a new photo on-site or upload an existing image from your device.
Take a New Photo
To capture and attach a photo directly to a Job:
Open the relevant Job in WorkPal.
Navigate to the Images section.
Tap the Camera icon (📷).
Your device's camera will open automatically.
Take the photo and save it to attach it to the Job.
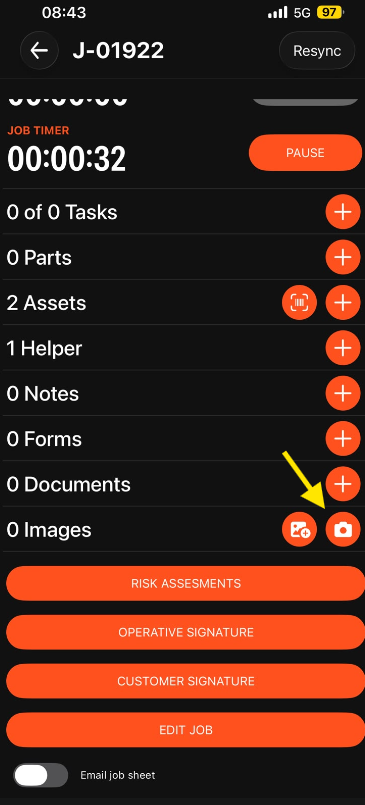
Tip: Use the Camera icon when you need to capture live site updates, completed work, or asset conditions while on-site.
Upload an Existing Photo
If you've already taken a photo and want to attach it to a Job, Site, or Asset:
Open the relevant Job, Site, or Asset.
Navigate to the Images section.
Tap the Add Image icon (🖼️➕).
Select the required image from your device's gallery or photo library.
The image will upload and be attached to the record.
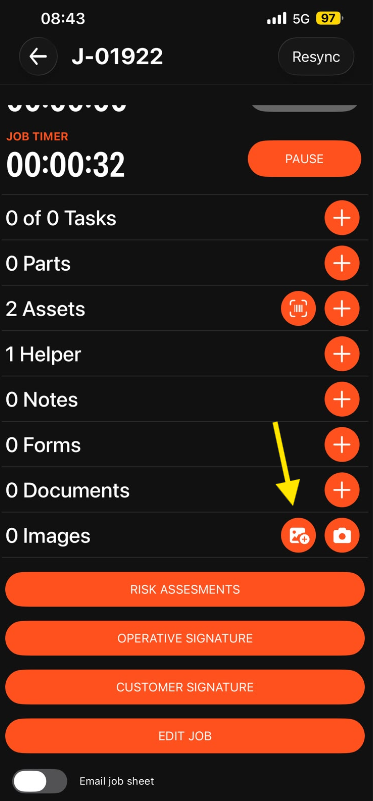
Using the correct icon ensures images can be added quickly and accurately, whether you're capturing a new photo on-site or attaching one you've taken previously.
Need a Hand?
Images are a great way to document completed work, site conditions, asset information, or issues that require attention. If you're experiencing problems taking photos or uploading images in WorkPal, our Support Team is here to help.
📞 028 9344 5660
📧 support@workpal.app
🌐 www.workpal.app